Tachometer using Arduino

Tachometer using Arduino
Tachometer is
a RPM counter which counts the no. of
rotation per minute. There are two types of
tachometer one mechanical and other one is digital. Here we are going to design an Arduino
based digital tachometer using IR sensor module to detect object
for count rotation of any rotating body. As IR transmits IR rays which reflect back to IR receiver and
then IR Module generates an output or pulse which is detected by the arduino
controller when we press start button. It counts continuously for 5 seconds.
After
5 seconds arduino calculate RPM for a minute using given formula.
RPM= Count x 12 for single object rotating body.
But
here we demonstrate this project using ceiling fan. So we have done some changes that is given below:
RPM=count x 12 / objects
Where
object
=
number of blade in fan.
Components Used
- Arduino
- IR sensor Module
- 16x2 LCD
- Push button
- Bread board
- 9 volt battery
- Connecting wires
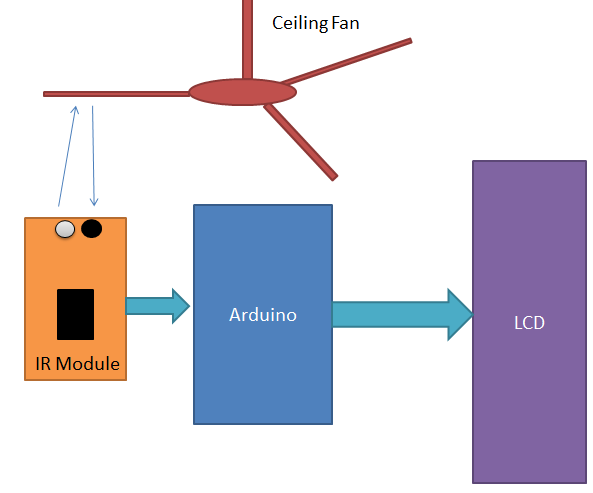
Circuit Diagram and Explanation

As
shown in the above tachometer circuit, it contains Arduino Pro
Mini, IR sensor module, buzzer and LCD. Arduino controls the whole the process like reading pulse that
IR sensor module generate according to object detection, calculating RPM and
sending RPM value to LCD. IR
sensor is used for sensing object. We can
set sensitivity of this sensor module by inbuilt potentiometer situated on IR
module.
IR sensor module consist an
IR transmitter and a photo diode which detects or receives infrared rays. IR transmitter transmits infrared rays, when these
rays fall on any surface, they reflect back and sensed by photo
diode (You can understand more about it in this Line
Folloewr Robot). The
output of photo diode is connected to a comparator, which compare photo diode
output with reference voltage and result is given as output to arduino.

IR
sensor module output pin is directly connected to pin 18 (A4). Vcc
and GND are connected to Vcc and GND of arduino. A 16x2 LCD is connected with arduino in 4-bit mode. Control pin RS, RW and En are directly connected to arduino pin
2, GND and 3.
And data pin D4-D7 is connected to pins 4, 5, 6 and 7 of arduino. A push button is also added in this project. When we need to count RPM we press this button to
start this Arduino Tachometer to count RPM for five seconds. This push button is connected to pin 10 of arduino
with respect to ground.
Program Description
In
code we have used digital read function to read output of IR sensor module
and then calculate RPM.

Demo & Code
Tachometer using Arduino
 Reviewed by XXX
on
สิงหาคม 27, 2560
Rating:
Reviewed by XXX
on
สิงหาคม 27, 2560
Rating:
Reviewed by XXX
on
สิงหาคม 27, 2560
Rating:


ไม่มีความคิดเห็น