Graphical Programming Drawing Robot On The Wall
Overview
Kids in makerspace often like to play with drawing robot, but those drawing robots on the market are either too pricey or hard to program, so there comes to our project, we made this project for beginners who would love to learn coding and give them sufficient exposure to mechanics, hands-on ability. With this drawing robot, you can learn trigonometry or even drawing skills (kidding!). Anyway, we would like to inspire next generation of maker.
We used a Scratch 3.0 based off-line version software for the ease of programming. The software is called KittenBlock, it uses blocks for programming and is very easy to get started with. Graphical blocks can help beginner to avoid loads of typing and syntax, creating a bridge to learning a powerful and commonly used programming language such as C++.
Parts
Hardware materials:
Wooden board x1
Acrylic sheets x1
Wheel x2
Dupont wires
Screws and nuts
Marker pen in any colors
Electronics:
Stepper Motors x2
RosBot Baseboard x1
You might notice that we used stepper motors but never mentioned motor drivers. It is because the RosBot baseboard has 2x dual H-bridge motor drivers on board and is fully compatible with the software Kittenblock. We also used stepper motors for the accuracy since it's a drawing robot.
Graphical programming software:
KittenBlock v1.26 (Based on Scratch3.0)
download here
Step 1: Laser cutting and assembly
In the mechanical design, our original thought was to build the robot as simple as possible, but the process turned out to be complex. We used laser cutter, which might not seen very common, to design and cut out the frame.
So we recommend you to design your very own drawing robot with the available tools you have.
There are many ways to design the frame of wheel gear, pen holder and wooden base, such as 3D printing, laser cutting or even hand drilling. This video is just to show you our design phases and gives you a broad idea of how to design.
There are still plenty of rooms for improvements such as build a pen lifter, use servo to lift the pen when you are not using it. Another little thing that needs to be improved is the pen holder, is hard to keep the balance of the pen.
Step 2: Graphical programming
Before we start coding, let's load the default firmware to the RosBot Baseboard first.
Open Arduino panel and select "Restore > Arduino" to load default firmware into the edit box. Then press "Upload" button, the embedded Arduino IDE in KittenBlock may automatically compile and upload the default firmware.
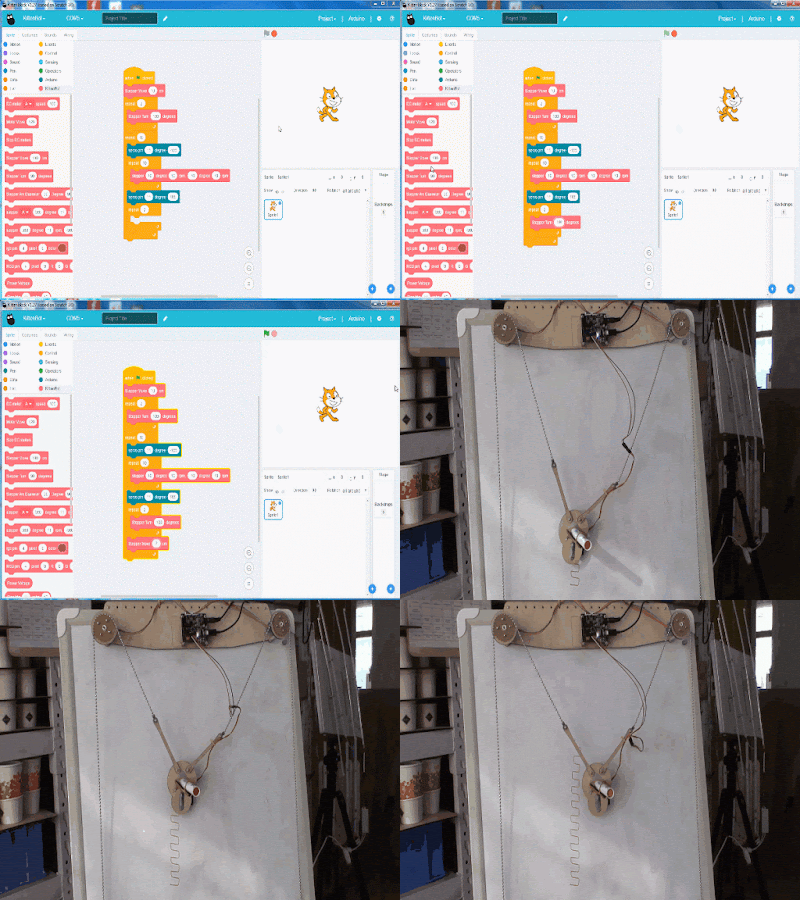
In the KittenBlock, the block code 'Stepper Move' is basically drive both motors to move in the same order. So in terms of drawing, the result could be drawing a horizontal line.
Then the block 'Stepper Turn' is to rotate both motors in different directions and same speed, so the result could be a vertical line. The most useful blocks we need are those two:
The first block is to turn a single motor in any degrees and rpm you set.
The second block is to turn both motors in set degrees and rpm, so theoretically, the drawing robot can go anywhere depends on the length of the turning wires.
This robot can also done with a regular Arduino. In Kittenblock, go to Arduino panel then click on translate, you will see the block codes you have done in terms of Arduino codes. But reminds that you will need two extra motor drivers if you are using Arduino UNO.
Graphical Programming Drawing Robot On The Wall
 Reviewed by XXX
on
สิงหาคม 07, 2560
Rating:
 Reviewed by XXX
on
สิงหาคม 07, 2560
Rating:


ไม่มีความคิดเห็น